vertical jump

GAIN AN INCH ON YOUR VERTICAL JUMP

How do you increase your vertical?  The answer is surprisingly simple: Jump!  If you want to become a better shooter, get up a lot of shots.  If you want to improve your dribbling, spend time handling the rock.  And if you want to jump higher, commit to a vertical jump program.  This week’s blog post shows a jump exercise that will increase your coordination and get you another inch above the rim.  

VERTICAL JUMP… IN 3 PLANES

A basketball jump program should mirror the movements that you do on the court.  You elevate forward to finish at the rim.  You jump laterally when rebounding.  You rotate when shooting a turn-around jumper.  Each one of these movements requires coordination and must be practiced.  

Here’s a quick video of the Box Jump Matrix with Single Leg Balance.  As you can see, it includes all three planes of motion.  Special thanks to professional basketball player, Ira Brown, for letting us use his big-time hops for the demo.

https://www.youtube.com/watch?v=BevwHTncGvU

QUICK & QUIET JUMPS

Here are a few tips that will help you get the most out of your jumps:

  1.  Jump as high as you can.  There’s a difference between endurance and power.  If you want to become better conditioned, doing a lot of reps at sub-maximal effort will help.  But if you want to jump HIGHER, you must jump as high as you can on every rep.
  1.  Quick and Quiet.  Vertical jump expert, Chad Chambers @UDJumpAcademy, teaches his athletes to get quick off the ground and land quietly.  This improves how high you can jump on your second attempt and also saves your joints from excessive pounding.  
  1.  Progress your program.  If this is your first time doing a jump program, start with limiting your total jumps in a workout to 50  (10 forward, 10 left lateral, 10 right lateral, 10 left rotation, 10 right rotation).  As your body gets stronger, you can increase the total number of jumps to 100+.  

If you want to see more basketball-specific jumping videos, check out our YOUTUBE channel.  

Do you have any tips that have helped increase your vertical jump? I’d love to hear about it!  Please leave a comment below. 

goal mapping

WHAT YOU MEASURE IMPROVES

How bad do you want to reach your goal?  Bad enough to it write down and place it where you’ll see it day and night?  Bad enough to work towards it’s attainment every week, regardless of whether you’re sick, tired or injured?  If so, I can almost guarantee it’s going to happen.  

GOAL MAPPING

Here’s my three-step process for creating and tracking your path to success.  It involves goal mapping and reading an Affirmation every day.  I not only use it with my players, but my kids and I also have Goal Maps hanging in our rooms.  It might seem a little crazy, but it works!

STEP 1: TEST

When you’re following a map, it’s important to know your starting point.  If you want to dunk a basketball, you need to know how high you can touch.  If you want to improve your free throws, you have to know your current shooting percentage.

Do some research and select a test that will measure what you want to improve.  Then test yourself so you can find out your starting point for Goal Mapping.  My son Carter tests his vertical every month on a Vertec and we post the results on his bedroom wall.   

STEP 2: CREATE

Now that you know where you’re starting from, you can create the path to where you want to go.  I suggest Goal Mapping to track your monthly progress and writing an Affirmation to read every morning and night. 

Here’s a picture of my son Carter’s Goal Map that hangs on the wall in his room.  You can change the measurements and timeline to match your goal.  

Click the link to download a Goal Mapping pdf:

B4B Goal Mapping

In addition to goal mapping, you need to write an Affirmation Statement that will move your goal from your conscious brain to your subconscious mind.   

Words are powerful and what you repeatedly say to yourself creates your reality.  Make sure you’re building yourself up and reinforcing a positive attitude.  

Here’s a sample Affirmation that I use with my players who want to dunk.  You can change the highlighted areas to match your goal.

AFFIRMATION

By November 15, 2016, I will dunk on a 10-foot hoop.  To accomplish this goal, I will do my jumping program every week.

I believe with all my heart that I will dunk a basketball.  My faith is so strong that I can already feel the ball in the net with my hands on the rim.

I have a written training plan to increase my vertical and will follow it every week until I’m playing above the rim.

Write your Affirmation with a pen and paper and post it above your Goal Map.  Read the Affirmation while you’re brushing your teeth in the morning and before you go to bed.  

STEP 3: WORK

Dreams only come true when you wake up and go to work.  Follow your written plan every week and then test yourself at the end of the month to track your progress.

Depending on your goal, you might not see improvements every month.  Expect that this will happen and continue to track your progress.  Remember, what you measure improves!

You build self-confidence by continually setting goals and accomplishing them.  It’s the kind of unshakable confidence that can only be earned through hard work.  

Good luck with your Goal Mapping and Affirmations.  I’d love to see them when you’re finished.  Take a picture, post it on Instagram or Facebook and tag me so I can see the finished product.  

Nutrition game for basketball

HOW TO WIN THE NUTRITION GAME

We all know that nutrition impacts the way we feel, look and perform, yet most of us struggle to consistently make quality food choices.  Busy schedules cause us to skip meals and eat fast food on the run.  It takes all our will power just to make it to the gym, leaving us unmotivated to improve our diets.   So instead of adding another commitment to your busy life, try playing a game.   Taking advantage of the fact that we all love to play, the Basketball Nutrition Game turns eating healthy food into something to look forward to.  Players love to compete, especially when the results are looking and feeling better.   Here’s a simple and effective nutrition game to get you and your team excited about improving the way you eat:

RULES OF THE NUTRITION GAME

1.  Earn points by eating approved foods.
2.  Report the previous day’s points on a tracking sheet
3.  The highest point total for the week wins

Here’s a PDF version of the Tracking Sheet along with the Nutrition Game Rules:
B4B Nutrition Game

BREAKFAST
15 pts – Eat any breakfast
10 pts – Eat a vegetable
 5 pts – Eat fruit
 5 pts – Eat an approved protein source
Max of 35 points possible at breakfast

 LUNCH  5 pts – Eat any lunch
10 pts – Eat a vegetable
  5 pts – Eat fruit
  5 pts – Eat an approved protein source
Max of 25 points possible at lunch DINNER
  5 pts – Eat any dinner
10 pts – Eat a vegetable
  5 pts – Eat fruit
  5 pts – Eat an approved protein source
Max of 25 points possible at dinner SNACKS
  5 pts – Eat a snack
  5 pts – Eat a 2nd snack
Max of 10 points possible for snacks WATER
  5 pts – Drink only water for the day
Max of 5 points possible for water

100 points possible for the day

3 VERSIONS OF THE NUTRITION GAME

Here are three ways to keep the Basketball Nutrition Game fresh and new:

PLAYER VS PLAYER
The player that earns the most points gets to choose conditioning for the day, gets bragging rights, etc.  

TEAM CHALLENGE
If the teams earns enough points for the week, they get to choose conditioning, etc. 

COACHES VS PLAYERS
Average the total points for the coaches and compare it to the average total points for the players.   

Try out the Basketball Nutrition Game and let me know how it goes.  I’d love to hear your successes and challenges.  Good luck!

Rebounding exercise for basketball

BUILD STRENGTH FOR REBOUNDING

Great rebounders don’t wait for the ball to come to them… they go get it. Grabbing boards in traffic requires mobility and strength above your head in every direction. While traditional strength exercises are helpful for most athletes, basketball players need to train for the specific requirements of their game. 

The Overhead Shoulder Matrix was designed by the Gray Institute and is the perfect rebounding exercise for battling under the boards.

This article was originally written for the Spokane Hoopfest Blog.  To read the entire article and learn more about Hoopfest, click HERE

THE PERFECT REBOUNDING EXERCISE

The Overhead Shoulder Matrix utilizes the fact that there are three planes of motion that your body has to be strong in: sagittal, frontal, and transverse.

We rebound in the sagittal plane when the ball is in front or behind us.

We rebound in the frontal plane when we side bend in the air.

We rebound in the transverse plane when we have to rotate to grab the ball.

As a general rule of thumb, basketball players should focus on total body exercises instead of isolation exercises in the weight room. The Overhead Shoulder Matrix trains all the muscles that link your feet to your hands and is perfect for players looking to increase functional upper body strength.  

Here’s a quick video of my favorite rebounding exercise:

https://www.youtube.com/watch?v=ZeN52_Pxjhg

To read the full article, checkout the Spokane Hoopfest Blog, home of the world’s largest 3-on-3 basketball tournament.  There you’ll find basketball training and nutrition tips, as well as inspiring stories about people who love hoops. 

What’s your favorite Basketball Rebounding Exercise?  Share it with the B4B community so we can dominate the boards together.  

Basketball reaction drills for quickness

5 BASKETBALL REACTION DRILLS

Do you want your speed & agility drills to transfer onto the court?  Since most of the movements we make during a game are based off reading other players, we need to train ourselves to react. Fortunately, reaction time is a skill that can be improved through well-designed basketball reaction drills.  

Here are five basketball reaction drills that will help you pick off passes and chase down rebounds.  Special thanks to David Stockton for helping with the video and a BIG congratulations for signing with the Sacramento Kings!  He’s a great player and even better person.  

https://www.youtube.com/watch?v=on9CqijcRjE

5 BASKETBALL REACTION DRILLS

Reaction Balls are a great tool to help improve reaction and quickness on the court. You can purchase them for under $10 online.  My players love training with them because it feels more like play than work.  Use your creativity to develop more basketball reaction drills to help in a variety of situations.  Here’s an overview of the five basketball reaction drills I use most with my players:

CLOSEOUT 2 BALL REACTION

1.  Partner 1 holds a ball in each hand with arms in a “T” formation.
2.  Parter 2 closes out from the baseline in a balanced position.
3.  Partner 1 chooses which ball to drop and Partner 2 catches it.   

SINGLE BALL REACTION

1.  Partner 1 tosses a ball at head height.
2.  Partner 2 has to catch it in one bounce.
3.  Count how many catches in a row.

BOUNCE PYRAMID

1.  Toss the ball overhead and let it bounce before catching.
2.  2nd toss: let it bounce twice.  3rd toss: let it bounce three times, etc.
3.  See how many bounces you can reach without breaking the chain. 

PARTNER WALL REACTION

1.  Partner 1 tosses the ball agains the wall.
2.  Partner 2 has to catch the ball without letting it touch the ground.
3.  Count how may catches in a row.

PARTNER 2 BALL HAND DROP

1.  Partner 1 holds a ball in each hand.
2.  Partner 2 places their hands on top of Partner 1.
3.  Partner 2 feels the ball drop and catches it before it hits the ground. If you’d like to see more basketball-specific quickness drills, visit our YOUTUBE channel.   Do you have any Reaction Ball drills that have helped improve your quickness on the court?  If so, I’d love to hear about them.

Recovery Nutrition for Basketball

RECOVERY NUTRITION FOR BASKETBALL

Like we do every Sunday, a group of my best friends gathered at the Warehouse Basketball Facility to play hoops before the Super Bowl.  I warmed-up well, briefly stretched out and began to play.  Up to this point, there was nothing unusual about the morning.  I had no idea that 45 minutes later I would rupture my Achilles tendon. To improve rehab time and make up for the fact that I won’t be able to play hoops for at least eight months, I’ve implemented some recovery nutrition strategies.   Anytime you’re making changes to your diet after surgery, it’s important to check with your doctor.  I chatted with my surgeon and he was comfortable with me starting this recovery nutrition regimen after my first check-up.   Here is a brief overview of the three recovery nutrition areas I’m focusing on:

1. DECREASE INFLAMMATION

Although inflammation is a necessary part of the healing process, it can also hinder recovery if you’re not able to reduce swelling and allow new blood to enter the injured area. 

There are a ton of different foods and supplements that will help with swelling, but it would be overkill to try them all.  

Here are the recovery nutrition strategies that I’m using to decrease inflammation:

FISH OIL. I’ve added a spoonful of fish oil into my Power Smoothie.  Fish oil contains Omega-3 fats which are a powerful anti-inflammatory.  Make sure you buy a quality brand that won’t cause you to burp up a fish taste.    

TURMERICI take turmeric every night.  If you haven’t heard of it before, it’s a plant that contains curcumin, which is used to help reduce inflammation.  To make it convenient, I bought it in pill form and take it with a glass of water before bed.  

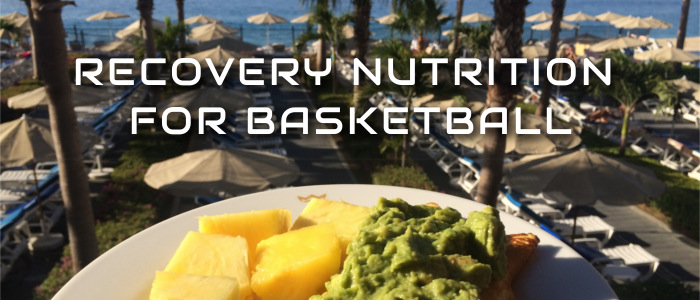
AVOCADOS.  I’ve been eating avocados multiple times throughout the week.  They’re high in monounsaturated fat and taste great on fajitas, fish, omelets, etc.  The above picture is one of my favorites breakfasts: Spinach & mushroom omelet covered in avocados with fresh pineapple… oh, by the way… I wrote this post from Mexico 🙂

2. ADJUST INTAKE

Now that I’m not playing ball every week, I find myself not feeling as hungry throughout the day.  I have to make sure I’m still getting enough food in because my body is working harder at rest to repair the damaged tissues.  

I also don’t want to overeat and then worry about losing unwanted weight when I’ve finally recovered.  It’s a fine balance that I’m still trying to figure out.  

Here are the recovery nutrition strategies I’m using to adjust my intake:

5 SMALL MEALS.  Instead of eating larger meals, I’ve switched to five smaller meals.  This allows me to get nutrients in without feeling too full.

VEGGIES AS CARBS.  My carbohydrates are coming primarily from vegetables and some fruits.  Since I’m not depleting muscle glycogen from tough workouts, I don’t have to worry about eating foods like potatoes or rice.  

ONLY 1 POWER SMOOTHIE.  I’ve cut back to only having one Power Smoothie a day.  When I’m training hard, I usually have one with breakfast and another right before bed. 

3. REBUILD TISSUE

The protein we eat gets broken down into amino acids, which our body then uses to build our skin, hair, bones, muscles and tendons.  

I actually haven’t made much of an adjustment here since this is an area I normally focus on.  I still thought I’d include this in the blog post because it’s an important part of the recovery process.  

Here are the recovery nutrition strategies I’m using to rebuild tissue:

EGGS FOR BREAKFAST.   I always include a protein source in my breakfast.  Most of us like eating cereal, toast, bagels and other carbohydrates in the morning, but it takes a little more effort to include foods like eggs or turkey.  I like to have scrambled eggs because they only take five minutes to cook and taste great.

EAT FISH.   I eat fish at least once a week.  In addition to being a great source of protein, fish contain Omega 3 fatty acids which help with inflammation.  This is a double bonus!

PROTEIN POWDER.  I throw in a scoop of protein powder into my Power Smoothie.  This adds an additional 25 grams of protein to the fruits, vegetables and nuts that are already in the drink.  

As you can see, the changes I’ve made are simple but all play a part in speeding up the recovery process.  I have another two months before I’m able to run and then I’ll have to reevaluate my routine and make sure that it’s supporting my goals.  

If you’re interested in reading more about recovery nutrition, check out this 4-part article by Dr. John Berardi of Precision Nutrition:

Nutrition For Injury Recovery

Do you have any recovery nutrition tips that have helped you through an injury?  If so, leave a comment below so I can hear about them!

Basketball core exercises MB Double Fake

TRAIN YOUR CORE FOR BASKETBALL

Go to most gyms and you’ll see people training their core muscles by doing Sit-Ups, V-Ups and Crunches. While these exercise are helpful in strengthening your abdominals while lying down, basketball players need core strength when cutting, posting up and finishing at the rim. If you want to get more than just six-pack abs out of your training, keep reading to learn three ways to create basketball core exercises.

This article was originally written for the Spokane Hoopfest Blog.  To read the entire article and learn more about Hoopfest, click HERE

1.  TRAIN ON YOUR FEET

Training should be specific to the demands of your sport. Since basketball is played standing up, basketball core exercises should be performed standing up.

2. TRAIN IN 3 PLANES OF MOTION

Our core muscles need to decelerate and accelerate movement in three planes of motion. Exercises like crunches improve flexion and extension but leave us weak when we need to bend and rotate.

3. TRAIN QUICK

The majority of abdominal exercises performed in the gym are done slowly to increase the burn. While controlling motion is important, our core muscles also need to be explosive.

BASKETBALL CORE EXERCISES

My favorite basketball core exercise is the Medicine Ball Double Fake. It’s helped me rip the ball through defender’s hands and increase the quickness of my live-ball moves.

Here’s a quick video of the MB Double Fake:

https://www.youtube.com/watch?v=2Swd210HxKc

To read the full article, checkout the Spokane Hoopfest Blog, home of the world’s largest 3-on-3 basketball tournament.  There you’ll find basketball training and nutrition tips, as well as inspiring stories about people who love hoops.  

What are your favorite basketball core exercises?  Are they performed standing up?  Are they in 3 planes of motion?  Will they improve your quickness?  Leave a comment below and share with the B4B community!

Increase Vertical

HOW TO INCREASE VERTICAL JUMP BEFORE BEDTIME

My all-time favorite athletes are my three children: Carter, Ella and Memphis.  I’ve been thinking of ways to use my passion for basketball strength and conditioning to help them enjoy their athletic careers, and came up with a fun game to help them increase their vertical jump.   Beware:  Although this is a great way to increase vertical, it’s also a clever way for kids to delay brushing their teeth.

INCREASE VERTICAL JUMP

The picture below is the doorframe to Carter’s room.  Each numbered piece of paper is a quarter inch higher than the next.  Every time he touches a piece of paper, I take it off the frame and we celebrate. Increase Vertical Door I remember the first time I touched the door frame of my room, the ceiling in my house, the foam on the backboard, the rim, and eventually the top of the square.  Each benchmark was a big deal because I’ve always dreamt of flying like Michael Jordan.   I don’t have any expectations that Carter will be able to dunk from the free throw line, but I know from training thousands of athletes that the best way to increase vertical leap is to jump as high as you can, and do it often.  If you want to jump higher, you have to practice jumping high.   We have a couple other athletic related bedtime routines that we’ve implemented and it’s been amazing to see how fast kids improve.  I love this challenge because it’s based off of the principles of success and progression.  We started touching strips that were almost easy for him in order to build up his confidence.  He must have told me ten times, “Dad… this is easy!”  As I took off the lower numbered pieces of paper, the challenge grew only slightly because the next piece of paper is just a tad higher than the one he just touched.   Here is a short video of Carter touching #7 for the first time:https://www.youtube.com/watch?v=Km4RT5HG4rg

THE RESULTS

In the four weeks we’ve been doing this drill, Carter has gone from touching #5 to touching number #12.  This means he’s increased his vertical jump almost two inches!

I’m excited to see him discover how to jump off one foot and learn how to use his arms for power.  You can already see in the video how he throws his hands back to put his front core on stretch.  These are things I might have to coach him a little on, but for the most part, all I have to do is present him with a challenge and his body will figure out the rest.

If you’d like to see more basketball-specific exercises to increase vertical jump, visit our YOUTUBE channel.

Do you have any fun ideas to help kids become more athletic and increase vertical?  Leave a comment below and tell me about it!

Nutrition Habits

THE 6-WEEK NUTRITION SCHOOL

Basketball Nutrition is so powerful in helping athletes reach their goals, that I’d rather see players miss a workout rather than miss a meal.  With off-season training ramping up, this is the perfect time to focus on eating better.  In this post, I’ll explain the 6 nutrition habits I use with my athletes to keep them on track throughout the year.

NUTRITION vs WORKOUTS

When you lift, you’re actually breaking down your muscles and you finish the workout weaker than when you started.   Don’t believe me?  Try doing as many push-ups as you can after a tough workout and I guarantee it will be a lot less than what you could do when you’re fresh.   So why do we continue to workout hard if it makes us weaker?  Because if you rest and refuel properly, your body will recover and grow even stronger than it was before.  Since your muscles are made from the food you eat, improving your nutrition habits is one of the biggest keys to getting better.

NUTRITION SCHOOL

A great friend and colleague of mine, Peter Clark, and I have put together a 6-week Basketball Nutrition School for our college athletes and we revisit it multiple times throughout the year.  While the nutrition habits we teach might seems simple, it doesn’t mean they’re easy to do.

Before we review the nutrition habits, here are a couple things we’ve learned the hard way:

1.  Just because you hear something one time, doesn’t mean that you’ve implemented it into your daily routine and mastered it.  I’ve found that going back to the basics throughout a season allows players to adjust their nutrition habits to their changing schedules.

2.  We also don’t give them all the information at once. We give them one nutrition habit per week and make sure that they’re successful with it before moving on to the next one.

Here is a list of the 6 Basketball Nutrition Habits we teach, along with one homework assignment that we give out each week:

6 BASKETBALL NUTRITION HABITS

1.  Snacks – Make a Power Smoothie
2.  Breakfast – Make an omelette
3.  Lunch – Make a salad
4.  Dinner – Make fajitas
5.  Water – Pack your water bottle
6.  Sugar – Sacrifice for a healthy treat

I like starting off Nutrition School by adding snacks because it’s the easiest thing to add and it pays off with huge results.  The biggest mistake I see with athletes is that they don’t get enough whole foods throughout the day.  The Power Smoothie is a great tasting way to sneak in some fruits and veggies and it literally only takes a few minutes to blend one up.

I give them limited instructions on how to make it because I usually learn a few tips by what they report back to me.  The players are really proud of themselves when they come up with a unique flavor combination.  The only guidelines I give them is that everyone is responsible for having:

SHOPPING LIST

1.  Blender
2.  Frozen fruit
3.  Frozen vegetable
4.  Nut butter
5.  Protein powder

Even with these few requirements, the options are almost endless.  I’ve used blueberries, peaches, cherries and strawberries for the fruit.  I usually use a combination of spinach, kale and chard for the vegetables.  For nut butters, I rotate either almond butter, peanut butter or cashew butter into my Power Smoothies.

Here’s a recipe that I’ve been loving lately:

BERRY CREAMSICLE SMOOTHIE

 – Water
– Frozen berry mix (strawberries, blackberries, blueberries)
– Frozen spinach
– Natural peanut butter
– Creamsicle flavored whey protein powder

To hold players accountable, I have them take a picture of their smoothie creation and text it to me.  The picture for this blogpost was taken by some of my players after a tough workout.

This has been a fun way to get to know my athletes a little better and stay in good communication with them throughout the season.  To spice it up a little, whoever sends the most creative picture gets to choose our conditioning for the day.

Do you have effective ways of helping athletes eat better that you’d like to share?  I’d love to learn about them.  Please leave your comments to help out our players, coaches and parents.  I’m excited to hear what you come up with!

PLAYER. COACH. PARENT.

I’ll never forget the day I was playing Nintendo at my friend’s house when his dad yelled from the other room, “Hurry!  The new Michael Jordan commercial is on!”  Watching him fly through the air for the first time was the most inspiring thing I’d ever seen.  After the commercial ended, we immediately ran outside to shoot hoops and I insisted on being Air Jordan.  This was the moment I fell in love with basketball.

Fast-foward 30 years and I’m still in love with the game.  My passion has evolved to studying off-court training that impacts the mind, body and spirit to maximize performance.  As you’ll see, there is more than one reason why I continue to learn…

I’M STILL A PLAYER

I was lucky enough to play basketball at Gonzaga University and professionally in Germany for 2 years.  I still love playing hoops and get together every Sunday with my friends to lace up the shoes (even on Mother’s Day, which took some negotiating with my wife).  A big part of my love for learning basketball nutrition and strength training is so I can apply it to my personal game.  I’m definitely still a PLAYER at heart.

I’M A FULL-TIME COACH

My coaching career began shortly after my senior year ended at GU.  I tore my Achilles tendon and was forced to take a year off of basketball.  When I learned that I could make a living training athletes in strength and conditioning, I thought I’d died and gone to heaven.  It felt like I was cheating the system by getting paid to do what I love.  

I currently work as the Head Strength and Conditioning Coach for Gonzaga University and also train local high school players.  My full-time job is to COACH athletes on how to eat healthy, move efficiently, and lead well.

I LOVE BEING A PARENT

My newest career started 6 years ago when my son Carter Blue was born.  I had already thought I knew what love was because I’m married to the best person in the world, Rhiannon Nilson.  She’s still my number one, but having children has been a game-changer for me.  We have since added Ella Grey and Memphis Black to our family, which has made me the luckiest person in the world.  

Now that Carter has been getting into basketball, I wanted to pass along everything I’ve learned as a player and coach.  On the other hand, I never want basketball to come in between our relationship as father and son.  To my kids, I always want to be a PARENT first.  

PLAYER. COACH. PARENT

So this blog is going to document my journey as basketball parent, player and coach.  I’m going to write about the drills and techniques that are helping my college and high school athletes.  I’ll share the things I’m still working on to improve my game on Sundays.  And from time to time, I’ll let you into my family life and show how I adapt these concepts to make them fun for my kids.  

Thanks for joining me on this journey.  I’d love to hear your comments and I’ll do my best to incorporate your feedback into future posts.  See you soon.